Post processing 3D prints
Quick answer
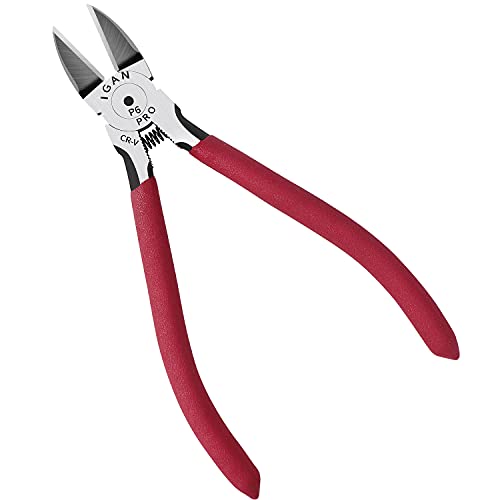
Remove supports first with flush cutters, such as the IGAN-P6 side cutters ($7.49), then sand or debur rough spots with a kit such as the 32 Piece 3D Print Tool Kit ($19.99), and only move to filling, priming or painting once the surface is fully clean and dry.
This order of operations is a widely followed workshop convention among 3D print hobbyists rather than a single published standard, since it depends on the printer type and material used.
What counts as post-processing, and why does the order matter?
Post-processing is everything that happens to a print after it stops moving on the plate or vat: support removal, cleaning, sanding, gap filling, and any painting or coating. Doing these steps out of order wastes work, since sanding before supports are fully removed just means sanding around obstacles, and painting before a surface is clean and dry traps debris or moisture under the finish.
The order below works for both FDM and resin parts, though resin parts have extra safety steps folded in at the cleaning stage since the material itself is different.
What is the right way to remove supports without gouging the part?
For FDM prints, flush cutters, such as the IGAN-P6 side cutters or the Klein Tools D275-5, cut support material close to the surface without the tearing that pliers or a knife can cause. Work from a support's free end back toward the part rather than prying at the point of contact, which reduces the chance of pulling a chunk of the actual model surface away with it.
For resin prints, supports separate more easily once the part is fully cured, since cured resin resists tearing far better than the soft, washed-but-uncured state. Removing resin supports before curing risks distorting the part where the support was still providing structural support during the wash step.
When should I sand a print, and when am I just wasting time?
Sanding is worth doing on visible surfaces where layer lines or support scars matter for appearance, and on mating surfaces that need to fit precisely against another part. It is not worth doing on internal, hidden or purely functional surfaces where nobody will see or touch the layer texture.
A deburring tool, such as the VASTOOLS 18Pcs Deburring Tool Kit, handles small support nubs and sharp edges faster than sandpaper alone, and combining the two, deburring first for material removal and sanding after for surface finish, gives a cleaner result than either alone.
How do I measure whether a finished part actually meets its dimensions?
A digital caliper, such as the HARDELL Digital Caliper or the standard 6-inch Digital Caliper Measuring Tool, is the standard way to check whether a post-processed part still fits its intended mating hole, shaft or bracket after sanding or filling. Measuring before and after sanding on a tight-tolerance part catches over-sanding before it becomes a wasted print.
This step matters most on functional parts meant to snap fit or bolt to something else; purely decorative prints rarely need this level of checking.
Do resin prints need anything different at the cleaning stage than FDM prints?
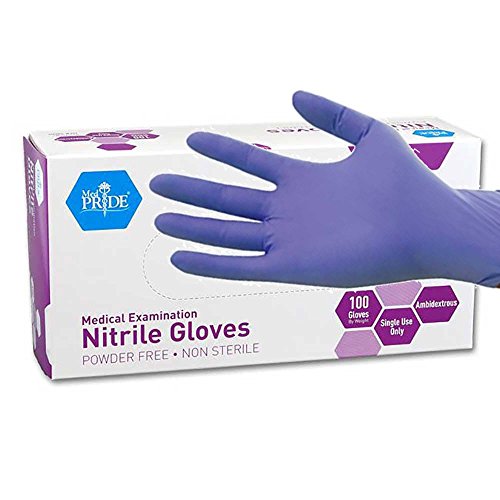
Yes. FDM support removal and sanding produce inert plastic dust and chips that need no special handling beyond normal cleanup. Resin parts at this stage may still carry uncured resin in surface texture or under a support scar, particularly if curing happened before every nook was fully exposed to light, so gloves stay on during support removal and sanding on a resin part until you are confident the surface is fully cured.
Sanding a resin part also generates a fine dust that should not be inhaled; work wet with a bit of water on the sandpaper where practical, or wear a mask, since dry-sanding cured resin can aerosolize fine particulate.
What tools actually cover most post-processing jobs without overbuying?
A flush cutter, a deburring tool, a set of needle files and a digital caliper cover the vast majority of post-processing jobs across both FDM and resin prints. A combined kit, such as the 68Pcs 3D Printer Tools Kit with Storage Case, bundles most of these into one purchase rather than buying each tool separately.
Skip specialty tools like rotary sanders or airbrush setups until a specific project actually calls for painted or mirror-finish results; most functional parts never need them.
| Step | FDM | Resin |
|---|---|---|
| 1. Remove supports | Flush cutters, work from the free end | Remove after full cure, not before |
| 2. Clean surface | Wipe off dust or debris | Confirm fully cured and dry, gloves on if unsure |
| 3. Deburr and sand | Deburring tool then sandpaper | Wet-sand or wear a mask for dust |
| 4. Check fit | Digital caliper against mating part | Digital caliper against mating part |
| 5. Finish | Fill, prime, paint as needed | Fill, prime, paint as needed |
Equipment mentioned here
- BOENFU
BOENFU Wire Cutters Heavy Duty Snips Flush Cut Side Cutters Pliers
$7.99 Check pricePrices change often - Supmedic
Supmedic Soft Max Medical Nitrile Exam Gloves Powder-Free Blue 100 Pcs (L)
$8.98 Check pricePrices change often - MED PRIDE
MedPride Powder-Free Nitrile Exam Gloves, Iris Blue, Medium, Box/100
$9.99 Check pricePrices change often


Safety
Common questions
Can I remove supports on a resin print right after washing, before curing?
It is better to cure first. A washed-but-uncured resin part is still soft, and removing supports before curing can distort the shape where a support was providing physical structure. Curing first locks the geometry in place, then supports separate more cleanly.
Do I need to wear a mask when sanding FDM prints?
For most PLA, PETG and ABS sanding done briefly and in a ventilated space, a mask is not strictly required, though anyone sanding for extended periods or in an enclosed room may prefer one for comfort. It matters more when sanding cured resin, where fine particulate is a bigger concern.
What is the fastest way to fill layer lines before painting an FDM print?
A sandable filler primer applied in light coats, sanded between coats, is the standard approach for filling visible layer lines before paint. Heavier single coats tend to obscure fine surface detail rather than just filling the lines, so multiple light passes give a better result.
How do I know if a support scar will actually affect how a part fits together?
Measure the affected dimension with a digital caliper against the mating part's tolerance before deciding whether to sand it down. A scar on a purely cosmetic face rarely needs correction, but one on a surface that slides or presses against another part should be checked and sanded flush if it is out of tolerance.
Is it safe to sand a resin print that might not be fully cured yet?
No, not with bare hands. If there is any doubt about full cure, treat the part as though it still carries uncured resin: wear nitrile gloves and avoid dry sanding that could aerosolize partially cured material. Confirm full cure first, which removes the ambiguity entirely.